Emergency Preparedness and Provident Living Newsletter
June 2025
The main focus this month is gardening for beginners. This post also has information on adding edible plants to your landscape.
#1 The BEST time to start a garden was years ago. The second-best time is right now. The cost of all of the supplies go up in price and as we age or our health declines, it gets harder to start a garden from scratch. By this I mean, to build or assemble raised beds and put in a sprinkler system. Also, if you wait until you or your spouse has lost a job, or the economy really tanks, you will still need money to get a garden going. The best time to do this is now, when you have an income or you are not under a lot of stress from illness or other problems. “Make hay while the sun shines!”
Once you have your garden system in place...the day-to-day garden chores are quick and easy. I spend less than 1 hour a week doing garden chores most of the time. Design your garden to be easy to use as you age or for future health issues. A little more work now, will make it easier to have a garden in the future.
#2 I highly recommend using raised beds. These can be made from lumber such as Redwood or Cedar, cinderblocks or metal such as the Vego brand beds. Raised beds are great because you can fill them with GOOD soil that is easy to work with. A deep raised bed takes less bending and makes weeding and planting quick and easy. Deep beds also allow for good root growth. And with a raised bed, I never need to till. I simply stir the dirt with a shovel or pitchfork. Leave at least 3 feet in between each garden bed to allow for walking, planting and taking a wheelbarrow between the boxes. Through as needed. Keep each bed to no more than 4 feet across. You need to be able to reach the center of the bed from either side. You can make your garden beds as long as you want.

#3 Fill your garden with good fertile soil. The soil that we all have in our yards has a lot of clay and it compacts down too much. My soil mix that I make is easy to do and is fairly inexpensive. I buy everything at the hardware store. My beds are 4x8 ft. this is how much I mix for that size bed: fill grow box half-full with topsoil after removing the rocks. To each bed I then add 1 full bag of peat moss. Then I add in 2-3 bags of composted steer manure, and a few pounds of play sand. Mix well with a shovel. As time goes on, I add other things to the grow boxes such as old potting soil, wood shavings, either new or after cleaning out the rabbit or guinea pig cage. Grass clippings, vegetable scraps and used bedding from your chickens. (Chicken poop is considered “hot” and needs to decompose for at least 6 months before putting in the grow boxes.) Rabbit poop is safe to put directly into the garden. Each Spring I usually add a couple more bags of manure to the garden beds before planting.
#4 Use all the space possible to grow edibles in your landscape. We have used t-posts and cattle panels for a trellis in each grow box. You can also use a netting for trellises, plant in pots or buckets or plant edibles in your landscape with shrubs and flowers. It makes more sense to grow edibles instead of just grass and shrubs. Be creative and have fun. Things that can grow on a trellis are, squashes, cucumbers, pole beans, peas, gourds. New Zealand spinach which grows on a vine, nasturtium flowers and indeterminate tomatoes. Grow fruit trees or shrubs like raspberries or blackberries. Check out your local nurseries for fruiting bushes. Common fruits that grow on canes or bushes are raspberries, blackberries, boysenberries, blueberries, gooseberries, currants, goji berries and honey berries.
Many vegetables can be grown in buckets or tubs. Go to YouTube and watch videos on making a “self-wicking tub” by LDS Prepper and Gardening with Leon channels. These are not hard to make and once done it will hold 2-3 inches of water in the bottom of each tub. I have converted all 15 of my big tubs of herbs to be self-wicking tubs.
Below is a Greenstalk tiered planter. You can make or buy many different kinds of tiered planters.

Make use of the microclimates in your yard. Maybe most of your yard has full sun. But you probably have a shady spot or two. Use those cooler, shady spots to grow things that prefer shade or cooler weather like lettuce, radishes or kale.
#5 Know your gardening hardiness zone. In Northern Utah, we are zone 6b. Look for plants that can survive in zone 6b or colder such as zones 5 and 4. The higher the number, the hotter the climate. If you live in zone 6b and buy a plant with a tag that says it is for zone 7-10, it will not survive the Winter. Unless you have a large greenhouse for tropical plants, don't try to trick Mother Nature. She will always win. Grow things suited to your climate for the best success. Also, for new gardeners be aware that there are cool season vegetables and warm season vegetables. This means that is the season of the year where they grow the best. Pay attention to the seed packets and a good gardening book and plant the vegetable in the correct season of the year. Keep in mind that in much of The United States, you can get out in the garden in early Spring and plant cool weather crops. Then as it starts to get hot, plant the warm season crops. And in late Summer, make use of the microclimates in your yard. Maybe most of your yard has full sun. But you probably have a shady spot or two. Use those cooler, shady spots to grow things that prefer shade or cooler weather like lettuce, radishes or kale.
#5 Know your gardening hardiness zone. In Northern Utah, we are zone 6b. Look for plants that can survive in zone 6b or colder such as zones 5 and 4. The higher the number, the hotter the climate. If you live in zone 6b and buy a plant with a tag that says it is for zone 7-10, it will not survive the Winter.
Unless you have a large greenhouse for tropical plants, don't try to trick Mother Nature. She will always win. Grow things suited to your climate for the best success. Also, for new gardeners be aware that there are cool season vegetables and warm season vegetables. This means that is the season of the year where they grow the best. Pay attention to the seed packets and a good gardening book and plant the vegetable in the correct season of the year. Keep in mind that in much of the United States, you can get out in the garden in early Spring and plant cool weather crops. Then as it starts to get hot, plant the warm season crops. And in late Summer you can start to grow cool season crops again.
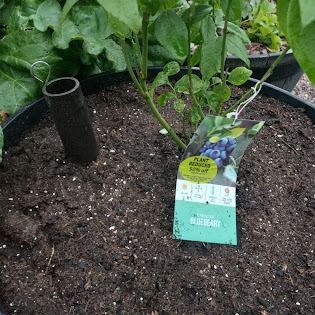
#6 Starting your garden from SEEDS is the cheapest way to do it. You can choose to buy plant starts but you will pay a lot more for them. Bonnie Brand seedlings are easy to find across the US. But they are terribly expensive. In 2025 it is very normal to see a lettuce seedling by Bonnie for $5 or more. At that price, just buy the produce in the store. If you want to buy seedlings, I suggest you look for stores or nurseries in your area that sell local-grown seedlings from a small, local nursery. These are usually sold in a plain black or red pot with no lettering. There will be a small plant tag in the pot with the name and location of a local nursery. These will be a very reasonable price.
#7 There is a big crisis in the world of beekeeping. 80% of the bee hives in the US have died of colony collapse in the last year or two. To help out the bees in your area, be sure to plant native flowers and lots of herbs. These will help to feed the bees. And do not use pesticide on your gardens and lawns. This is most likely the biggest reason for their decline. Most of the foods we eat, are pollinated by bees. If our food does not get pollinated, we will not have crops to harvest.
#8 I have bought live worms in the Sporting goods section of Walmart. I brought them home and I made a hole in each garden bed and put a few worms in each bed. I then covered them with dirt. The worms will help soften and fertilize the soil.
#9 Here are a few YouTube channels that I like to watch for gardening advice:
LDS Prepper on YouTube or ldsprepper.com (S.E. Idaho) Mittleider Gardening Method Book
Ali's Organic Garden and Homestead (Southern Utah)
The Provident Prepper (Utah)
Gardening With Leon (Oklahoma)
Homegrown Herbalist (Idaho) for natural, herbal medicines for man and animals
MI Gardener (Michigan)
Homesteading Family (Idaho)